This procedure also assumes you have an air compressor and touchup spray gun. A high quality airbrush will also work, but usually does not lay on a heavy enough coat of clear for the optimum results. C’mon, you need an air compressor anyway!
Let’s get started…
- Use 400 grit wet or dry paper under running water and sand the entire canopy. This removes the gloss from the gel coat and gives the paint a better surface to grab on to. Make sure the gloss has been removed. Any glossy spots will not allow the paint to stick properly.
- Wash the canopy with dishwashing detergent to remove all traces of grease and mold release agents. Try to minimize contact between your hands and the canopy for the remainder of the process in order to avoid oils from your skin affecting the finish.
- If the canopy has defects in it, like a center seam, fill the area(s) with automotive spot puddy. When dry, sand smooth with a sanding block. Repeat as required.
- Spray on a coat of gray automotive lacquer-based primer. This will have to be reduced with lacquer thinner to get the desired spray pattern.
- Sand the primer with 400 paper DRY until you are satisfied with the finish. Pay particular attention to pinholes – they must be nonexistent before the color goes on! Repeat this process as many times as you need to get a perfect finish. In the areas of defects, sand the primer almost completely off to avoid weight buildup. Pinholes will get filled in to some degree and, when shot with more primer, will eliminate the pinholes. If you sand the canopy wet, the primer ‘dust’ will not fill the pin holes and make it much more difficult to eliminate them. When completely finished with the priming step, you should have the equivalent of a single layer of primer on your canopy.
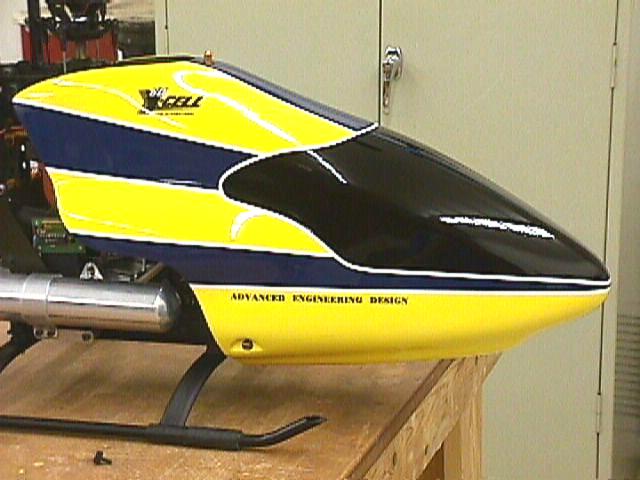
- Time for the first color coat. I use Krylon colors, and an automotive fuel-proof clear coat over them. The quality of the paint is not important, as the clear coat is fuel proof and extremely tough. Krylon is inexpensive, dries very quickly, covers well and is compatible with the lacquer primer and automotive clear coat. I always spray on a coat of white first. This gives your lighter colors like yellow a good bright base. Always spray progressively darker colors over the lighter ones. Prior to spraying any of the colors, make sure you use a clean tack rag to remove any dust particles!
- Use 3M blue automotive plastic masking tape (1/8") for your masking. This stuff is excellent – no bleed under and produces a razor sharp line.
- When all the color coats are finished, apply decals and tape. Rub them down hard with your fingernail.
- Lightly scuff the entire canopy – decals, tape and paint with #0000 steel wool to give the clear coat a proper surface to adhere to.
- Using automotive clear coat, spray on a light coat and let dry for 30 minutes, then lay on a gloss coat (or two if you like a deeper gloss). The first coat must partially dry and get sticky. This allows the subsequent coat(s) to adhere to the first, now sticky coat, and prevent runs. This applies to the color coats above also.
That’s all there is to it. It’s actually quite simple once you do it a time or two. The results are awesome!


Comments:
Similar pages:
Similar pages: